Author(s)
Introduction
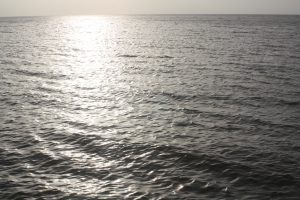
This summer we conducted research on the microlayer* of Corpus Christi Bay. The purpose of our research was to determine the health of the water in the Bay. Through conducting our research we hoped to find a reliable way of predicting red tide. Our research contributes to to the field of science because we took a scientific approach while conducting our research on a part of the environment, one that affects not only the people living in this area but the animals that live here too. Some questions we had about our research were: How healthy is Corpus Christi Bay? If the water isn’t in as good a condition as we hoped it would be, what can we do to improve its health?
*microlayer: the thin layer on top of the water, where the water meets the air.
Methods & Procedures
Our research was split into two parts: sampling and extraction. Sampling consisted of going out to Corpus Christi Bay and collecting water samples to take back with us to the lab. Extraction was the process (conducted in the lab) of taking the samples and combining them with dichloromethane** and extracting purely the sample using proper lab equipment and following a precise list of steps.
**dichloromethane: a solution that cleans and takes away organic compounds.
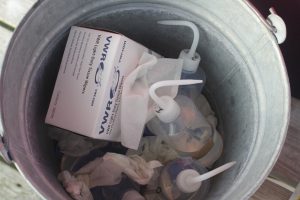
Sampling Process (2 hours):
powder-free nitrile gloves glass plate DI water ethanol kim wipes container of ice
clean vials & caps funnels rope
scraper
– Once we arrived to the sampling location we put on a pair of gloves. Then we put the rope through the hole at the top of the glass plate and tied multiple knots, making sure the rope was securely tied to the glass plate. We then cleaned the glass plate and scraper with DI water first and ethanol second; we made sure to use kim wipes to dry off them off after cleaning them. While this was being done, someone else was preparing the vial and funnel for sampling by removing the foil*** from the vial and funnel and placing the stem of the funnel into the opening of the of the vial.
– To begin the actual sampling process, one person held onto the rope and the glass plate and the second person held onto the funnel, vial, and scraper. The first person then took the rope and lowered the glass plate into the water, making sure the entire plate was under the water. They then “conditioned” the plate by bringing the plate almost entirely out of the water and then back down into the water; they did this a total of three times. After they had conditioned the plate three times, thy brought the plate completely out of the water (only holding onto the rope not the plate) and brought it over the vial that the second person was holding. The second person would maneuver the vial and funnel so that one of the bottom corners of the plate would fall into the funnel which allowed the Bay water to flow into the funnel. The second person would then use the scraper to scrape off the water from both sides of the plate, getting as much water into the vial as they could.
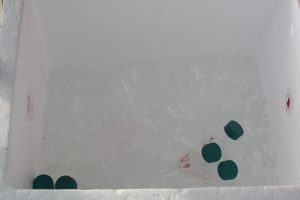
– Once the sample was taken we would screw a clean lid onto the vial, label the vial
appropriately using a sharpie, and place the vial into the container filled with ice. Each sample vial had to be marked with the correct date, location number, and sample number so we could keep track of them. Before we could take another sample, we would have to clean the glass plate and the scraper again with the DI water and ethanol.
*** the glassware (funnels and vials) we used in the lab were cleaned by being covered in foil and place in an over for four hours to remove any bacteria or organisms.
Extraction Process (1 1/2 hours):
powder-free nitrile gloves dichloromethane (DCM)
40 mL vial and lid N-alkane composite standard
separation funnel graduated cylinder
ring stand syringe
– First we put on a pair of gloves and removed the sample vials and standard from the refrigerator so that they could warm up to room temperature (about one hour). Making sure the stopcock on the funnel was closed, we then poured the sample into the separation funnel while also measuring the amount of sample and recording it. We then rinsed the vial out twice with DCM, added that to the funnel, and rinsed out the funnel with DCM to get rid of any residue. Using the syringe we then added the appropriate amount of the standard (based on concentration) to the funnel. Then we measured 5 mL of DCM in the graduated cylinder, added that to the funnel, attached a glass stopper to the funnel, and started to shake the funnel for two minutes.
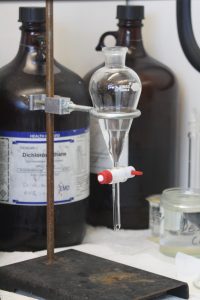
– We “burped” the funnel by removing the stopper every 10-15 seconds to release any built-up pressure. Once the two minutes was up we placed the funnel back on the ring stand and allowed the layers of DCM and water to separate completely. The DCM settled at the bottom because it’s heavier than water. After about two minutes, we placed a vial underneath the funnel, making sure the bottom tip of the funnel led into the vial. 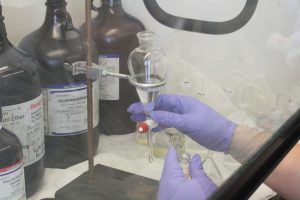
– We then opened the stopcock and drained the DCM layer into the vial; we had to be careful with this step, because we only needed the layer of DCM and none of the water in this vial. Once that was done, we screwed a lid onto the vial, labeled it, and stored it in the refrigerator.
Results
Although we collected many samples from Corpus Christi Bay we weren’t able to actually test the samples to see what the health of the Bay is like. The lab we worked in does not have the equipment necessary to do this, which is why we did the lab work that we could so we could prepare the samples to be sent off to a lab that has the equipment for testing the samples. We tried to collect as many samples as we could so that when they are sent off to be tested properly there will be a large group of samples sent.
Discussion
1. What are the results of the samples after being sent off to the lab?
2. How healthy is the water of Corpus Christi Bay?
3. Do we now have a better chance of predicting when Red Tide will occur and how severe it will be?
Lesson Plan
Engage:
– The students watch this YouTube video that discuss water pollution.
– https://www.youtube.com/watch?v=93BqLewm3bA
Explore:
– This website informs the students on the different types of water pollution. The students can add real-life examples of any of these types of pollution if they would like to share them with the class.
– http://eschooltoday.com/pollution/water-pollution/types-of-water-pollution.html
– The students will then participate in this online activity that teaches you how to make your own water filtration system.
– https://www3.epa.gov/safewater/kids/flash/flash_filtration.html
Explain:
– The students discuss what they learned from the water filtration activity and connect what they did/learned to real life outside the classroom. For example, how water pollution can affect them and the area they live in (especially if they live near a body of water).
– Students will group together to form a total of eight groups. Each group will be assigned a type of water pollution (refer to the first website listed in the Explore section). Each group needs to come up with as may examples of how that type of pollution effects the animals and ecosystems in that particular area as they can. The members from each group can share with the rest of the class the examples they came up with.
Elaborate:
– The students work together to come up with ways that we can prevent water pollution from happening. If needed you can return to the informational website mentioned in the Explore section that discussed the different types of water pollution to refresh the students’ memory and draw ideas from there. This website also offers information on preventions to water pollution in case the students have a hard time coming up with ideas. Once they come up with ideas, they can write them on either a large piece of butcher paper or a poster board that can be displayed in the classroom.
– http://eschooltoday.com/pollution/water-pollution/prevention-of-water-pollution.html
Evaluate:
– The students will individually create a poster to raise awareness on water pollution. They can use printer paper to draw pictures and write out a catchy slogan.
TEKS:
(3)(D) Scientific investigation and reasoning. The student uses critical thinking and scientific problem solving to make informed decisions. The student is expected to:
connect grade-level appropriate science concepts with the history of science, science careers, and contributions of scientists.
(9)(C) Organisms and environments. The student knows that there are relationships, systems, and cycles within environments. The student is expected to:
predict the effects of changes in ecosystems caused by living organisms, including humans, such as the overpopulation of grazers or the building of highways.