Presentation at ME by the SEa
June 13th, 2014
by Kim Moore
I. Logging In

- Go to eteamscc.com
- To add content to the website or edit existing content, click Login (in the top navigation bar) and enter your username and password (the username typically your email address before the @ sign)
- After logging-in, you will be redirected to your profile page. You can change your password, but this is not necessary or required.
- To return to the home page, click on the logo in the top left corner of the screen.
II. Adding a Research Log: Required Elements
- Right next to the link to the home screen, you will see From add new, there is a drop down that says research log.
- Name your Log.
- In the first open box, you can put text, a picture, or leave it blank.
- Discussion: you can choose to allow comments.
- More Fields: these coincide with the field notes logs provided in your binder. You need to write something in each of these fields: Who We Are, What We Did, What We Learned, Questions We Have, Connections to Teaching
- Categories: This is found on the right side of the screen. You need to check which of the nine projects that your research log belongs to (for ex: Blue Crab Ecology).
- SAVE: At this point, you can either save as draft or publish.
III. Formatting a Log

- alignment
- font color
- font size
IV. Editing or Deleting a Log
a) To get back to a log, you can go to the dashboard and click on all research logs.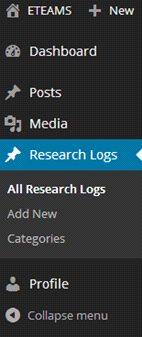
b) If you hover over your log, you will have the options to either edit or trash.
IV. Creating a Research Log: Additional Features
a) Set Featured Image is found on the bottom right of the screen. If you click on that, you can either use an image in the media library or upload your own image.
b) Linking a Document: Add Media allows you to link a word/pdf document. If you are linking a document, you can name that document. It is recommended you change the color so that others know that something is linked.
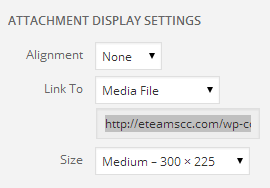
c) Uploading an Image: Add Media allows you to upload pictures. You can choose pictures from the media library or upload your own pictures. When you upload pictures. You will have the opportunity to adjust the size before inserting into post.
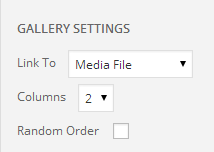
d) Creating a Gallery: If you want to insert multiple pictures at one time, you can go to create gallery (left side of the screen once you start adding media). You will then:
- Click on pix you want in gallery.
- Click create gallery.
- Go to gallery settings to adjust number of columns
- Click insert gallery.
e) Linking to a Website
f) Embedding a Video
- If you paste the URL to an online video (e.g., YouTube, Vimeo, Flickr, Hulu) onto its own line so that it’s not clickable (not hyperlinked), the website will automatically detect the video and embed it directly in your post. For example, the code below would be converted to a YouTube video when the post is saved.
https://www.youtube.com/watch?v=Yexc19j3TjE